No, not us! - Cervantes!
We bought Cervantes (a Burstner Ixeo Time it590) brand new in Feb 2013. Add to that the fact that it was a brand new model in Jan 2013, and it was obvious that there would be some teething problems.
Any brand new van has some problems - it just depends on the severity of them.
Cycle carrier
We originally thought we wanted a van with a garage at the back where we could put the bikes etc.
However, after a great deal of thought and discussion we decided against a garage for the following reasons. We wanted a van that we could take and park anywhere, the optimum length being 6 metres. (We have since been down some unbelievably narrow roads in Cervantes, to the point where Glyn has had to get out and direct from in front and hold branches back).
Anything longer than 6 metres tends to have a long overhang from the rear wheels to the back of the van to accomodate the garage. This puts more weight on the rear axle - especially when the garage is full.
 |
| A long overhang (from the rear wheels to the back) often means overweight |
|
|
The longer the van, the more the van weighs unladen, so the less payload (useable carrying capacity) you have. The unladen weight of Cervantes is 2775kg. This weight includes the driver (75kg), a full gas bottle and 60 litres of water. The gross permitted weight (which you are legally obliged not to exceed) is 3500kg. This gives us a payload of 725kg - nearly 3/4 of a tonne. Some vans with long overhangs and big garages have payloads of less than half that, so you have the room to carry lots, but not the payload to do so. (legally!)
For these reasons we opted to have a cycle rack fitted onto the rear of Cervantes. However, due to the position of the door of the toilet cassette (which you need access to for emptying), the cycle rack had to be offset slightly to the offside.
This meant that if standard 26" wheel mountain bikes were carried, the wheels obscured the offside light cluster of brake and indicator lights.
 |
| Lights obscured |
The choice was to go for smaller wheeled bikes (20" wheels), or to get a lighting board and associated wiring fitted.
We opted for the smaller 20" wheel bikes (from Decathlon and Eroski) which so far have proved to be adequate for what we want when touring.
 |
| Much better |
We still have the option of the lighting board if we decide that 26" wheel bikes would be better.
Fridge
Ever since the van was new, when the fridge was running on gas, I could smell exhaust fumes inside the van. Glyn could smell nothing, so I put it down to my sensitive nose.
On our tour to the Tour de France in July 2013, the fridge started becoming less and less efficient. We put this down to the extreme high temperatures and parking for the night on a steep sideways slope, which we read in the handbook could stop the fridge working if over 5° (which it was).
Back on flat, level ground after 2 days on a severe slope it seemed to start working again, but was still not very cold and the freezer struggled to freeze anything.
Reading forums and talking to other motorhomers on the road, we found that taking off the fridge vents helped the airflow and the cooling of the heat exchanger.
When we took off the vents we could see the top of the back of the fridge and the bottom of the back of the fridge.
The top had a foam seal between thr fridge and the bodywork which was tight against both. The bottom also had a foam seal, but there was a 1/2" gap between the seal and the bodywork - could this be the cause of the exhaust smell in the van?
 |
| Gap on the right hand side at the bottom |
 |
| Big gap on the left hand side at the bottom |
 |
| Gap halfway up on the left |
We took the van back to the dealer in early August and I showed him the seals. He nodded sagely, and told me within 10 seconds that the gas burner was also at fault and was not combusting properly. I could also now see the brown marks on the upper deflector plate and the inside of the vent grill as he had done - a sure sign of incomplete combustion.
 |
| Clear staining above the exhaust flue |
 |
| The same on the vent grill |
A replacement part was needed from either Dometic (who make the fridge) or Burstner (who put the fridge in the van). After a few phone calls it was established that both had shut down for August (usual in Spain), so they will e-mail me when they have them. The parts were duly fitted in early September and everything now works perfectly with no smell.
 |
| The fridge has been moved backwards to make a proper seal |
 |
| A new burner unit (silver box on right) and now sealed properly |
It was obvious that the fault with the seals was due to faulty fitting by Burstner, and for all I know the burner may have never worked properly.
I was relieved to discover that something was actually wrong with the fridge, and it was not a case of "there is nothing wrong - this is how it is supposed to work". We can now join the other motorhomers eating ice cream instead of drinking warm beer!
12v Sockets
When we bought the van in Spain it had the usual 2 pin 230v continental sockets, but also 12v sockets which were half the diamater of a standard UK one, which we had never seen before.
 |
| Standard 230v socket and a half-diameter 12v one |
 |
| 12v socket with cigarette lighter plug for size comparison |
We could not understand why they were different, because the ones in the cab of the Fiat were standard size, and every 12v appliance we have ever bought or seen in Spain/France/Italy/Switzerland have all had full size 12v plugs on them. This begs the question - who sells appliances with the smaller 12v plugs on them? - maybe the Germans as it is a German built van.
We scoured the internet and caravan shops for adaptors but found nothing. However all it took was a visit to Pepi at
Autocaravanas Navarro who sold us a continental plug to go in the socket. At €9 each it was a bit unfeasable to change every plug on every charger we had, so I took the UK plug off a 4 way charger I had brought from the UK, and replaced it with the continental one. I can now plug 2 or more chargers into the adaptor to charge at the same time.
 |
| 4 standard sockets from 1 continental plug |
 |
| Continental plug in the socket |
 |
| Continental plug without adaptor |
 |
| and with adaptor to make it into a standard sized plug |
We intend to spend as much time as possible on aires and wildcamping and so have no 230v hook-up for possibly weeks at a time (a 90w solar panel and an additional 90AH leisure battery gives us all the power we need).
Because of this we made sure that all our electrical equipment had a 12v power source.
We can charge the Nexus 7 tablet and i-pod with the
PowerGen charger. We thought that the Blackberry playbook would also charge with this, but for some reason would not. A dedicated charger is on the way.
 |
| Nexus 7 and charger |
 |
| Make sure you get the correct volts and amps output for your machine |
 |
| You can charge apple or non-apple machines with this charger |
We can charge the mobile phones with a standard charger. We have
Toggle sim cards in the phones, which give us up to 9 european numbers on one sim card. All calls made are at local rate, and there is no charge to receive calls. We couldn't believe it at first, but it really works and is really cheap - what a result!
 |
| Samsung phone with Toggle sim - brilliant |
We have a Samsung netbook (model N220) which is compact, powerful and does everything we need. We charge this at 19v and 2.1amps with this
Universal Charger - just make sure you set it to the correct voltage!!
 |
| Nettie and charger |
Cracked mouldings
Whenever we stressed the chassis on Cervantes e.g. going diagonally over a speed hump, there was always a sharp cracking noise from above my head - just the bodywork flexing I thought.
However, when I was cleaning Cervantes in early June I noticed cracking around the top fixing screw of the corner mouldings - had it been overtigtened by the usually meticulous Germans?
 |
| Top fixing screw (after sealing by Autocaravanas Navarro) |
 |
| Same on the nearside |
A visit to Autocaravanas Navarro cofirmed the cracking and, after sealing the cracks, 2 panels were ordered from Germany. We had them fitted at the same time as the fridge was fixed - all work at no cost to as as all done under warranty.
 |
| Good as new |
 |
| Matching stripes on the way |
Bathroom mirror
Nothing major and easily rectified by the dealers. The mirror doors in the bathroom had moved slightly and were catching at the top - simple re-positioning cured this.
 |
| Good shut lines on the doors now |
Cab arm rest
We sleep in the drop down bed all the time (leave it made up during the day). When I want to get out in the night, I use the ladder because I sleep nearest to the back of the van. Glyn sleeps nearest to the cab, and when she gets out in the night she uses the seat squab of the swivelled drivers or passenger cab seats. Or so I thought. It turns out Glyn has been getting down by standing on the armrest of the cab seat, so this has now come loose.
Simple job for the dealer to fix, and Glyn no longer gets down this way!
Water on roof
This is a design fault with some Burstners. The drop down bed is stored in the ceiling of the lounge. For this to happen there is a bulge in the roof to accomodate the bed. On the roof the bulge flattens out towards the back of the van.
At the point the bulge flattens out, any water (rain) collects at this point.
 |
| Right above the habitation door! |
If the van is leaning slightly to the nearside, the water overflows and runs down the side of the van - directly underneath is where the habitation door is situated.
As you step down to exit the van, you lean the van even more, so when you open the door the water pours into the footwell (via your head!)
 |
| The lowest point is just above the habitation door |
This we found out in Northern Italy after 2 days of continuous rain on the shores of Lake Garda - we were trapped in the van!
I thought of various solutions using sealant and a cartridge gun, but it was all going to be a bit messy and a bit of a bodge.
After research I found that Fiamma do a
rubber seal for this very problem. It is a strip of moulded rubber that fits between the awning and the side of the van, in various widths depending on how wide the gap is, and sold by the metre.
 |
| Sealed all the way along |
 |
| Stopped short at the back to avoid the rear locker |
I bought 4 metres and cut it to length so that the water now comes out in front of the window (if the van is sloping forwards) or between the fridge vents and the rear locker (if the van is sloping backwards).
I had 2 different widths on the van, so had to pack the wider one (nearer the front) with some plastic tubing which has worked superbly and looks very neat.
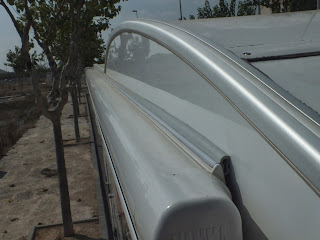 |
| Rubber seal and plastic tubing |
This is a product that really does work!
 |
| Water running off the front of the awning - not on my head! |
Door/Window problem
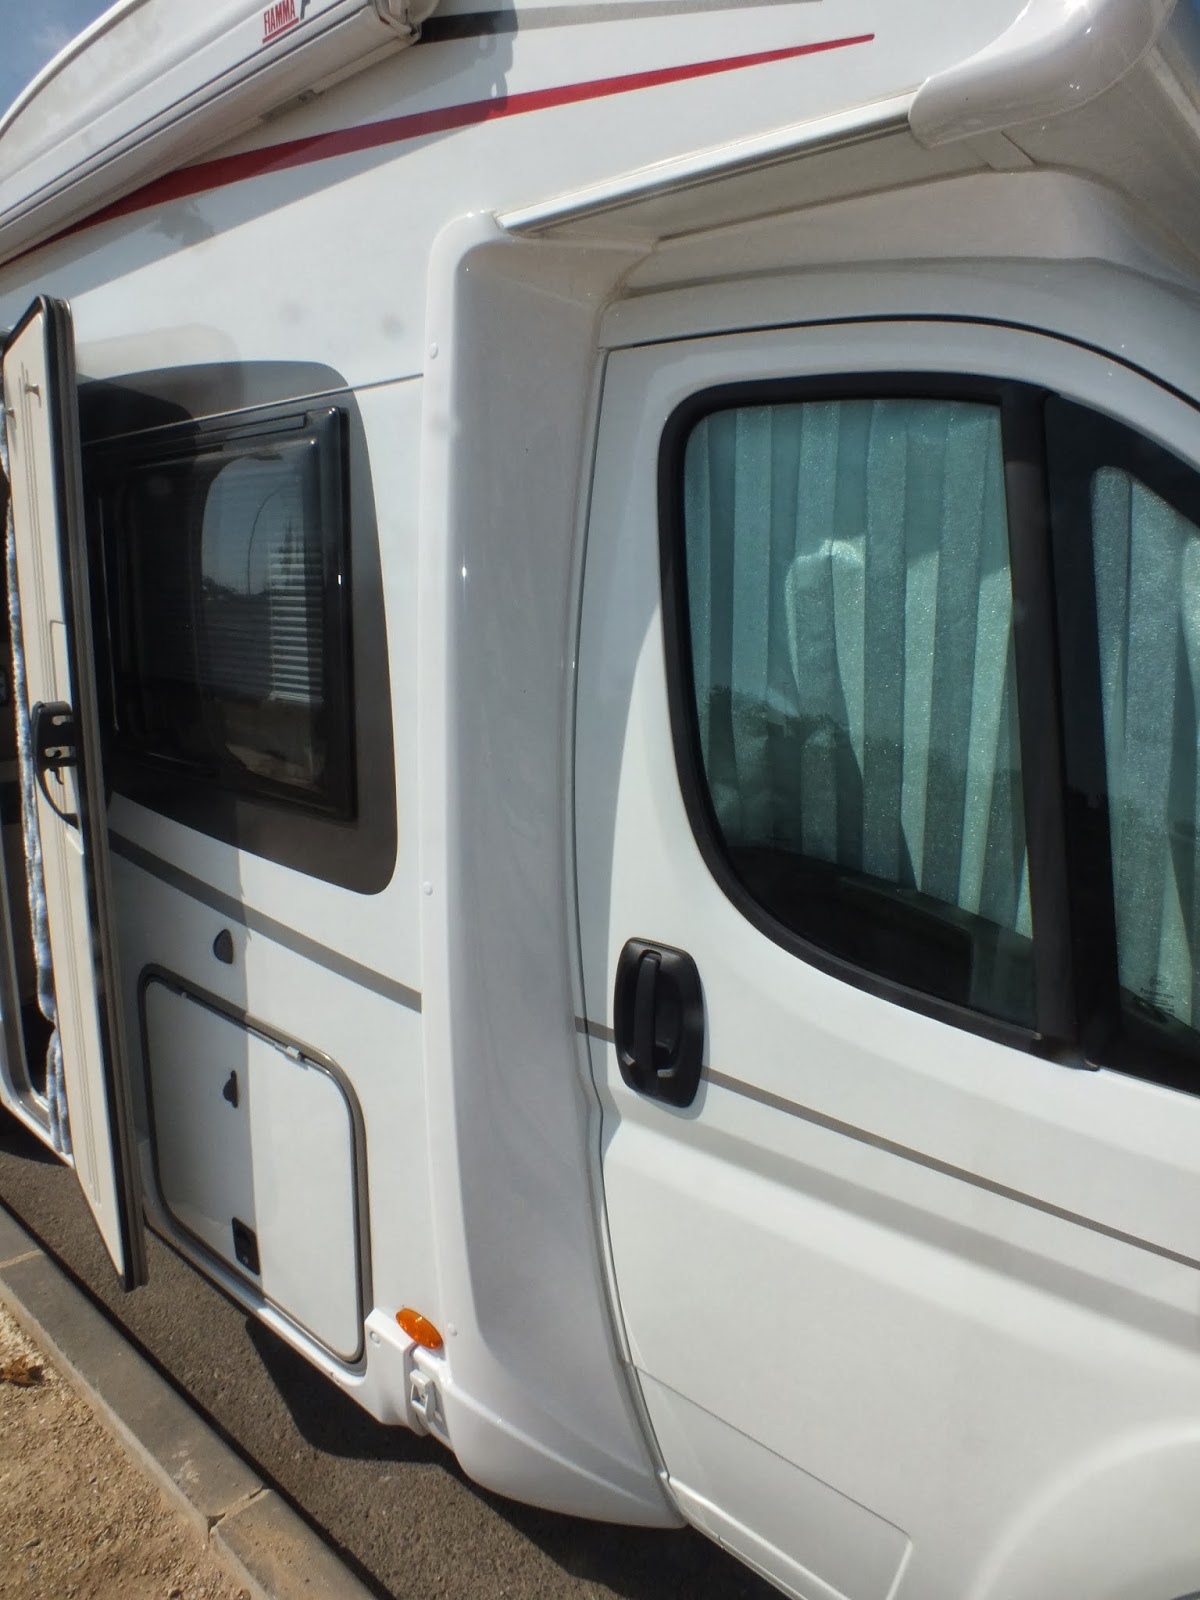
Another design fault with the Burstner is that you cannot open the door and the window at the same time. If you open the window with the door closed and forget about it, when you open the door it crashes into the window and takes the paint off the door.
 |
| Window in open position 1 |
 |
| Window in open position 2 |
 |
| Window in open position 3 |
As a temporary measure I've put felt pads where the open window and door meet, and then fixed the door in position with a ratchet strap - not very elegant and probably not safe in a wind.
What I really need is a way of locking the door open before it hits the window - still working on this one.
In the meantime I have discovered
Sugru which is an adhesive, self setting silicone rubber which I have used on the edge of the window to stop any more damage to the door.
 |
| Sugru around the edge of the window |
Hob cover
One of the screws holding the hinge to the glass cover came off in Briancon in the French Alps in July.
It was a security, torx headed bolt so obviously I didn't have the correct tools to tighten it up again, but I managed a temporary tighten with a very small electrical screwdriver in my extensive (not) toolkit.
 |
| Loose screw |
 |
| Why isn't this a crosshead screw? |
Water pump
The fresh water tank ran dry beside Lake Garda (very ironic because it had been raining solidly for 2 days). The tap was only on for a max of 5 seconds, but this was apparently enough to damage the water pump.
It started making high pitched whining noises after that, and finally gave up the ghost in Switzerland.
I tried all the normal shaking the pump and sucking the taps (still legal in Switzerland) to no avail.
With intermittent WiFi we e-mailed all the dealers from Switzerland to Southern Spain to ask if any could replace it under the Europe-wide warranty.
Only the Swiss one got back to us to say we didn't buy the van in Switzerland - so no. I was on the point of firing off a not very complimentary e-mail to Burstner when Glyn pointed out that Switzerland is not in the EU!
No one else replied.
 |
| The offending water pump in the fresh water tank |
Right we thought, we will just descend on the nearest dealer and rely on their honesty and decency and willingness to uphold the Burstner name.
The first one couldn't do it for 3 days (he told us after an hour of waiting), but the second one was spot on and did it in 20 minutes while we waited.
So it's 10/10 for
Avenir caravanes, and 0/10 for
Andrieux campingcars (although they did eventually phone ahead for us so possibly 3/10)
All repaired under warranty with no fuss whatsoever. Brilliant guys.
Water in the electrics
Another design fault is that when it is raining and you open the cab doors, the rain that is running off the front overhang drips straight onto the electric window switches - not good for the electrics. Luckily it doesn't rain much in Spain, but it must be an absolute nightmare in UK. No fix that I know of for this - just to be aware of it!
The scuttle
As with all Fiat Ducatos
, the scuttle leaks (check yours!) Fiat have made a half-hearted attempt to cure the leaks, but have made a pathetic attempt at it.
Check for yourselves - open the bonnet, then put 2 wine bottle corks under the wiper arms (to let the water flow under the wipers and through to the scuttle)
 |
| Corks under the wipers |
then pour 2 litres of water all along the top of the windscreen. Now put your head under the bonnet and see how much water is pouring onto your relays, fuses, ECU's, engine, gearbox and general electrical wiring. Frightening isn't it?
The cost of replacing any of this electrical wizardry is heart stopping - assuming you can find the fault, because mixing water and electrics usually leads to intermittent faults due to corroded connections and compoments slowly drying out. If you've ever had an internittent fault you will know just how frustrating that is.
 |
| A regularly soaked electrical component, just underneath a leaking screw |
I could have taken Cervantes to a Fiat dealer to have the fault rectified, but at the end of the day Fiat only produce one scuttle, so it would be no better than this one.
I mentioned it to the Burstner dealer when we were having some warranty work done. He sighed resignedly and showed me the windscreens on all his stock, both brand new and second hand, and every Fiat had the same scuttle and therefore the same problems.
The problem is twofold.
The first is that the scuttle is not attached to the windscreen. This means that when it rains the water runs down the windscreen, then between the windscreen and the scuttle and into your engine. There is a thin adhesive strip on the scuttle to stick it to the windscreen, but it appears that the adhesive is not waterproof (!!) and it soon peels away from the windscreen. It then expands and warps and actually pushes the scuttle away from the windscreen to make an even bigger gap for the water to pour down.
My first cure was to try an invisible fix by pumping clear silicone about 2cm below the top of the widscreen/scuttle interface. When dry and cured this should make an invisible watertight seal leaving the top edge as original. This was a good plan but it did not work in practice as it still leaked like a sieve! I then used a specialist sealer
 |
| Waterproof. flexible, adhesive specialist sealer |
to run a bead along the top of the joint between the scuttle and the windscreen (much like the seal between a bath and a wall - we've all had a go at that haven't we? - well Glyn does ours - steadier hand!) This bead was smoothed down and it worked perfectly - totally waterproof.
 |
| Water now beading off the joint |
 |
| Water now goes into the scuttle, not behind it |
The other problem was the scuttle itself (or to be more precise, the scuttle cover, but called the scuttle from now on)
Our motorhome is Spanish registered and left hand drive - I have no idea if UK right hand drive models have the same layout as I describe.
The scuttle is divided into 3 sections. In the nearside section is one small drain hole which exits above the nearside front wheel, and next to it a plastic bung approx 3cm in diamater.
 |
| The nearside section with crosshead screw, drain hole, and bung |
There is then a raised area to separate a large central section. This is made up of 2 separate sections joined in the middle. The offside section sits on top of the nearside section, thus there is a 2cm lip, the lowside being on the nearside. The main drain hole is further towards the offside, thus the water pools on the nearside of the join due to the different heights, then pours out of the unsealed join into the engine below.
 |
| The join in the central section |
Further over towards the offside is another raised area, followed by the offside section. This has a 3cm plastic bung and the offside windscreen wiper spindle. This offside section has no drainage at all, and water has to overflow down the back of the headlight unit to escape. Some water does drip down the wiper spindle, but most of it ends up pouring down the back of the light unit into the fuse box and the ECU.
 |
| Offside section with no original drainage (shown with drain pipe installed) |
Using the sealant, I sealed the joint between the pipe and the scuttle on the nearside section and also sealed around the plastic bung in the scuttle.
On the central section I then sealed the joint between the two halves of the scuttle. The water still pools in the nearside section, but now it does not drain away into the engine compartment - it just sits there to evaporate.
 |
| Joint now sealed - notice the height difference |
In the small offside section with no drainage, I took out the plastic bung altogether.
 |
| 3cm plastic bung |
You can press the bung out from underneath. I replaced it with a length of garden hose which was a good interference fit, but any suitable hose will do. This I sealed with more sealant both top and bottom.
 |
| New drainpipe sealed from above |
 |
| New drainpipe sealed from below (note zip tie around bonnet bracket) |
I then zip tied the hose onto the bonnet hinge bracket at the top, the bulkhead in the middle and the plastic wheelarch cover at the bottom, where it exits just in front of the front offside wheel.
 |
| Zip tied to a convenient hole in the plastic wheel arch cover |
 |
| Exit just in front of the O/S front wheel |
 |
| View from the bottom looking up to the electrics (now dry!) |
I also sealed the four crosshead screws that fix the scuttle cover to the scuttle, which has stopped the leaks from them.
When everything had set and cured I poured 3 litres of water along the top of the windscreen and - perfect, not a drop of water anywhere in the engine compartment (except down the offside windscreen wiper spindle, but as this needs to rotate I can't see a way round this, and it is not a serious amount of water - just a very slow drip)
The only problem left was where the main 4cm water drainpipe from the centre section of the scuttle exited. This was just above the gearbox, almost on top of where the gear selector enters the gearbox! Not good I thought, so extended it backwards by inserting a 3.2cm diamater pipe (local DIY store for €3.60 a metre) into the exit of the pipe (which is oval in shape, but made of soft rubber so you can insert a round pipe into it) and pushing it up as far as it would go.
 |
| Extension hose (furthest away) pushed into original hose (nearest to you) |
I then zip tied it to a nearby bracket, a torsion roll bar and a crossmember so it will stay in place.
 |
| Extension hose zip tied to torsion roll bar |
 |
| Extension hose zip tied onto crossmember |
A final seal with self amalgam tape over the joint and now the water exits onto the road with no leaks.
This is a cheap, effective fix (albeit not very pretty - but you can't see most of it). It really does work and really does need to be done to save your precious electrics under the bonnet.
I just hope I don't need another windscreen anytime soon or I'll have to do it all again!!
Conclusions
Cervantes has now done 15,000 kms and has impressed in every way - no complaints at all. There have been some problems along the way but nothing insurmountable that would put us off. The whole package is a very sophisticated bit of kit with the potential to go drastically wrong, and it is a testament to Burstner that the teething troubles have been minor.
Heres to the next 15,000 !!